Let's say you're like me and you like hosting crappy websites.
But you're too poor to buy a static IP.
You probably have a Raspberry Pi or some old junk laptop that contains all of your abandoned tech dreams.
If only there was a semi-reliable no-cost way to host all of your work on the net with a fancy URL.
Too bad Comcast changes your IP address whenever they feel like making DNS impossible.
Dynamic DNS is just what it sounds, DNS that changes dynamically whenever your IP changes.
There have been companies out there over the years that provide this service, but they are too complicated, and then they trick you and steal your Credit Card.
If only there existed a world class DNS provider with an API you could do easily do DDNS yourself.
CloudFlare is essentially a security oriented edge network.
If you've ever visited a website, then you've probably experienced CloudFlare.
They could bring down the whole internet if they wanted, or if they accidentally screw something up.,
There is a free tier which includes DNS, and an API.
There are a million different services that will provide your IP address for free.
You can poll any of these services to drive your DNS records.
    + curl ifconfig.me
    73.163.27.212

    + curl -4 icanhazip.com
    73.163.27.212

    + curl ipinfo.io/ip
    73.163.27.212

    + curl api.ipify.org
    73.163.27.212

    + dig +short myip.opendns.com @resolver1.opendns.com
    73.163.27.212

    + curl ident.me
    73.163.27.212

    # Doesn't seem to work anymore
    + curl bot.whatismyipaddress.com
    73.163.27.212

    + curl ipecho.net/plain
    73.163.27.212
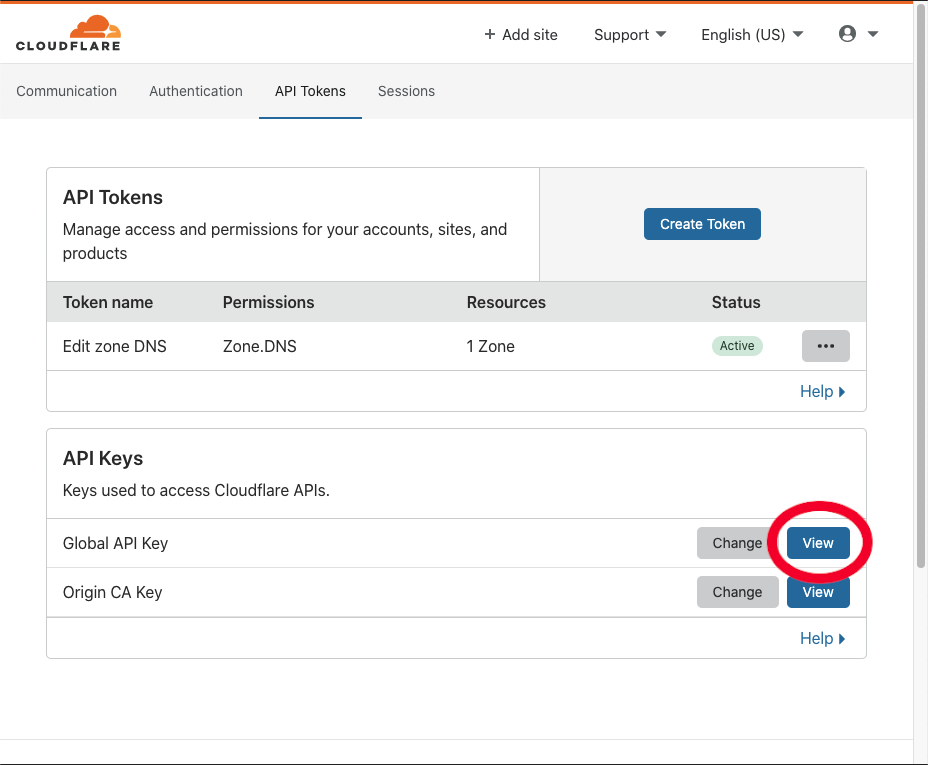
CloudFlare has two key based authentication methods, one is new and one is legacy. For the two API requests we need to make, we need the legacy keys.
The easiest place to get this information is from the API
Make the following API call
curl --location --request GET "https://api.cloudflare.com/client/v4/zones" \
    --header "Content-Type: application/json" \
    --header "X-Auth-Email: $YOUR_CLOUDFLARE_EMAIL" \
    --header "X-Auth-Key: $GLOBAL_API_KEY"
Which returns
{
    "result": [
        {
            "id": "YOUR_ZONE_ID", <-- This is what you want
            "name": "parrisvarney.com",
            "status": "...",
            ...
        }
    ],
    "result_info": {...},
    "success": true,
    "errors": [],
    "messages": []
}
Make the following API call
curl --location --request GET "https://api.cloudflare.com/client/v4/zones/$YOUR_ZONE_ID/dns_records" \
    --header "Content-Type: application/json" \
    --header "X-Auth-Email: $YOUR_CLOUDFLARE_EMAIL" \
    --header "X-Auth-Key: $GLOBAL_API_KEY"
Which returns:
{
    "result": [
        {
            "id": "2c3d224e3b32b036231c9af851a07079", <-- This is the Record ID
            "zone_id": "...",
            "zone_name": "parrisvarney.com",
            "name": "www.parrisvarney.com", <-- Use this record name to identify the correct ID
            "type": "A",
            "content": "73.163.27.212",
            ...
        },
        {...}
    ],
    "success": true,
    "errors": [],
    "messages": [],
    "result_info": {...}
}
Now with all of the paramaters you got from the previous calls, you can update your DNS record with your current IP.
curl --location --request PUT "https://api.cloudflare.com/client/v4/zones/$ZONE_ID/dns_records/$RECORD_ID" \
    --header "Content-Type: application/json" \
    --header "X-Auth-Email: $YOUR_CLOUDFLARE_EMAIL" \
    --header "X-Auth-Key: $GLOBAL_API_KEY" \
    --data-raw "{
        \"content\": \"$YOUR_CURRENT_IP\",
        \"ttl\": 120,
        \"type\": \"A\",
        \"name\": \"$THE_DNS_RECORD_NAME_ASSOCIATED_WITH_RECORD_ID}"
From your server, open vi and paste in the following code. Make sure to replace
config settings from the first few lines (read above if you don't know what to put).
Note: Neither emacs nor nano will work for this
#!/bin/bash

# CloudFlare Auth
AUTH_EMAIL={Your CloudFlair Email}
AUTH_KEY={Your "Global API Key"}

# CloudFlare DNS identifiers
ZONE_ID={Get from API, example above}
RECORD_ID={Get from API, example above}
RECORD_NAME={www.example.com}

# Get your current IP from the net
IP=`curl -4 icanhazip.com`

# Echo the curl command, uncomment for troubleshooting
# set -x

# Update your current IP using CloudFlare API
curl --location --request PUT "https://api.cloudflare.com/client/v4/zones/$ZONE_ID/dns_records/$RECORD_ID" \
    --header 'Content-Type: application/json' \
    --header "X-Auth-Email: $AUTH_EMAIL" \
    --header "X-Auth-Key: $AUTH_KEY" \
    --data-raw "{
        \"content\": \"$IP\",
        \"ttl\": 120,
        \"type\": \"A\",
        \"name\": \"$RECORD_NAME\",
        \"proxied\": true
    }"
Save this file as ddns.sh
Make it executable chmod u+x ddns.sh
Call this script periodically with cron
(crontab -l ; echo "* * * * * $(pwd)/ddns.sh")| crontab -
Running the above steps gets you a cheap way to host a local website without a static IP.
It also gets you some nerd cred. And hey, you get DDOS protection too. And free TLS.
Don't use this if you need something reliable as you will have an amount of downtime every time Comcast changes your IP. If you have a crappy modem because you're the type of person that can't afford a static IP, then your IP will likely change often.